Quick Start#
Set up badge issuing for your Open edX instance with Credly or Accredible. By the end of this guide you will have a working badge template that awards badges to learners automatically.
1. Prerequisites and installation#
The Credentials service must be installed and running on your Open edX instance.
Option A: Using Tutor (recommended)#
Install the tutor-credentials plugin (provides the Credentials service):
pip install tutor-credentials
Install the tutor-contrib-badges plugin (configures badge settings, event bus, and feature flags automatically):
pip install git+https://github.com/raccoongang/tutor-contrib-badges@main
See the tutor-contrib-badges README for additional details, including a sample Pipfile and manual service commands.
Enable the necessary plugins:
tutor plugins enable discovery mfe credentials badges
Rebuild images and launch:
tutor images build openedx discovery credentials
tutor local launch
The plugin automatically enables badge feature flags, configures the event bus, and registers the following consumer services:
credentials-eventbus-consumercredentials-certificates-eventbus-consumerlms-eventbus-consumercms-eventbus-consumer
Option B: Other installations#
Install the Credentials service following the Getting Started guide.
Enable badges in both services:
# openedx-platform (LMS) settings:
FEATURES["BADGES_ENABLED"] = True

# Credentials service settings:
BADGES_ENABLED = True
Configure the event bus and consumer processes. See Badging Settings for the full reference:
Event Bus Configuration - producer signals for LMS and Credentials.
Consumer Setup - running the
consume_eventsmanagement command.
2. Configure integration#
Set up your provider account and connect it to the Credentials admin panel for your instance.
For Credly:
Register on Credly and create your organization.
Create at least one badge template and publish it.
Retrieve your organization UUID and API key.
In the Credentials admin panel, navigate to
https://<your-credentials-host>/admin/badges/credlyorganization/and add a new organization.Set the UUID to your Credly organization identifier.
Set the API key used to authenticate with the Credly organization.
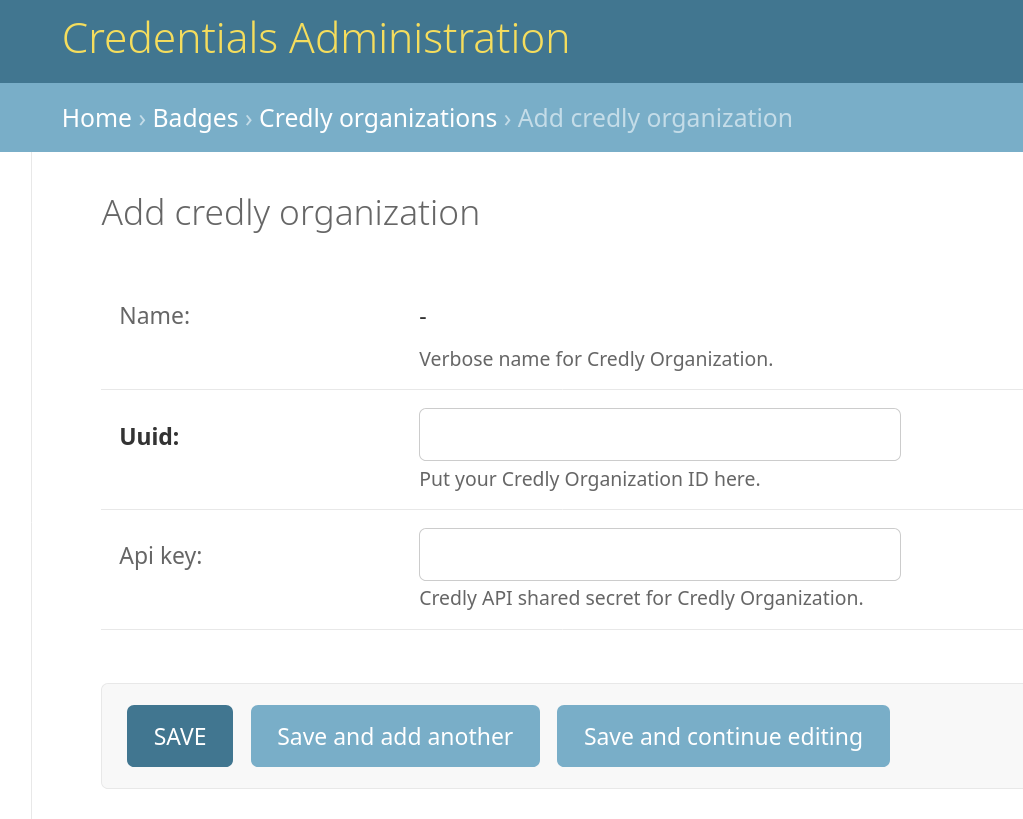
Verify the system pulls the organization’s data and updates its name.
For Accredible:
Register on Accredible and create your account.
Create at least one group.
Retrieve your API key from account settings.
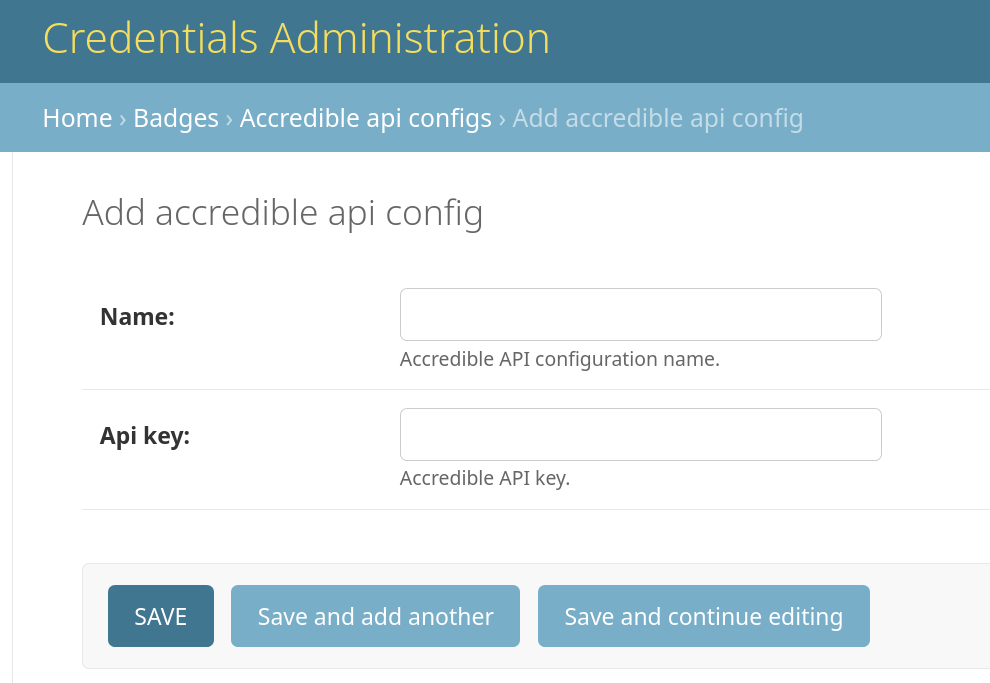
In the Credentials admin panel, navigate to
https://<your-credentials-host>/admin/badges/accredibleapiconfig/and add a new configuration.Set the API key from your Accredible account.
Set a name for the configuration.
See also
Credly
- Credly Configuration
Full Credly setup, webhooks, and synchronization details.
- Credly Authentication Methods
How to authenticate with the Credly API.
- Auth Tokens for Authorization
How to generate and manage Credly auth tokens.
Accredible
- Accredible Configuration
Full Accredible setup and synchronization details.
- How Do I Find My Integration API Key?
Finding your Accredible API key for integration setup.
3. Synchronize badge templates#
Synchronization imports badge templates from your provider into the Credentials service.
For Credly:
Navigate to
https://<your-credentials-host>/admin/badges/credlyorganization/and select the organization(s) you want to use.Run the
Sync organization badge templatesaction.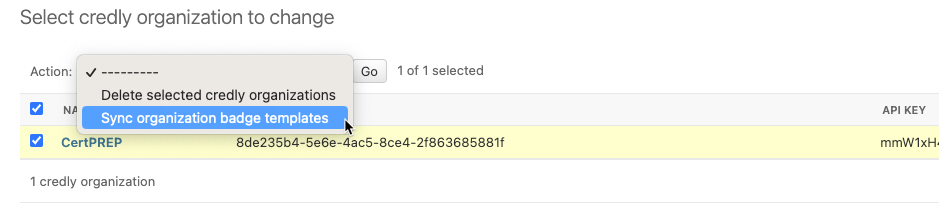
Navigate to
https://<your-credentials-host>/admin/badges/credlybadgetemplate/and verify the newly created templates.
See Credly Configuration for details on template synchronization and webhook setup.
For Accredible:
Navigate to
https://<your-credentials-host>/admin/badges/accredibleapiconfig/and select the configuration(s) you want to use.Run the
Sync groupsaction.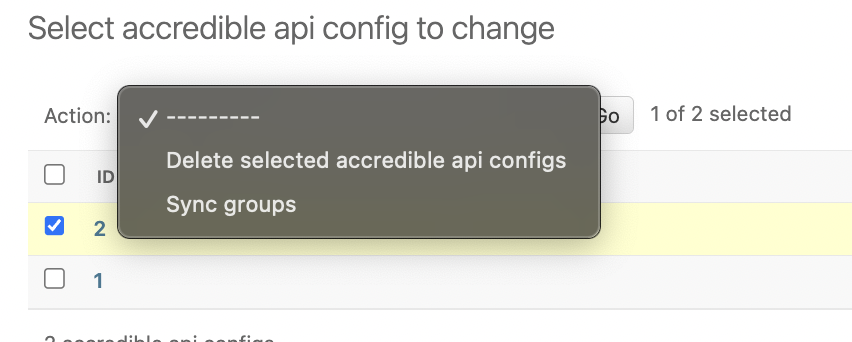
Navigate to
https://<your-credentials-host>/admin/badges/accrediblegroup/and verify the newly created groups.
See Accredible Configuration for details on group synchronization.
4. Set up badge requirements#
Requirements define what must happen for a learner to earn a badge. At least one requirement must be associated with a badge template.
In the Credentials admin panel, open the badge template or group record you want to configure from https://<your-credentials-host>/admin/badges/credlybadgetemplate/ or https://<your-credentials-host>/admin/badges/accrediblegroup/:
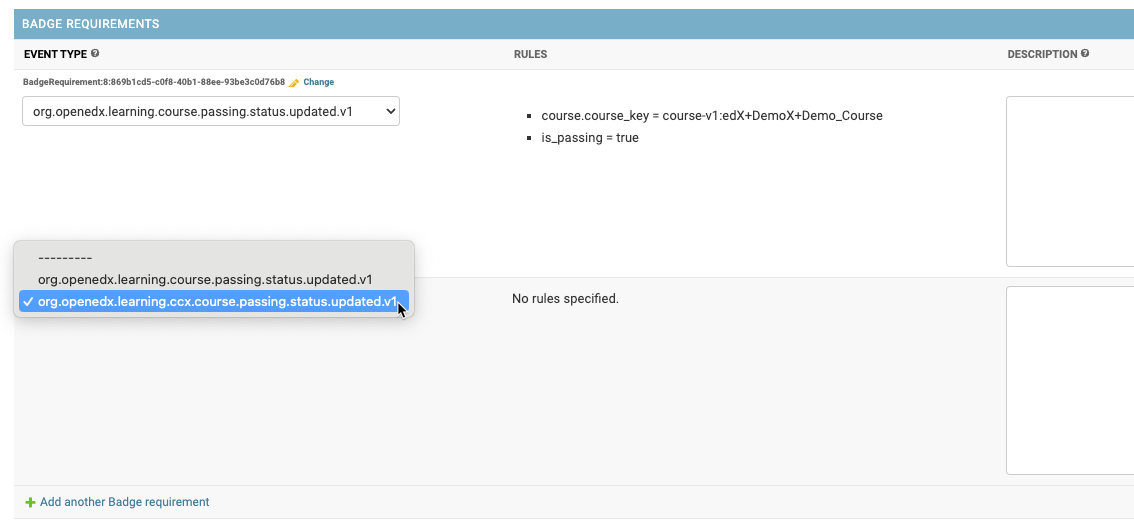
Find the “Badge Requirements” section.
Add a new item and select an event type (what is expected to happen).
Optionally, add a description.
Save and navigate to the requirement detail page by using the
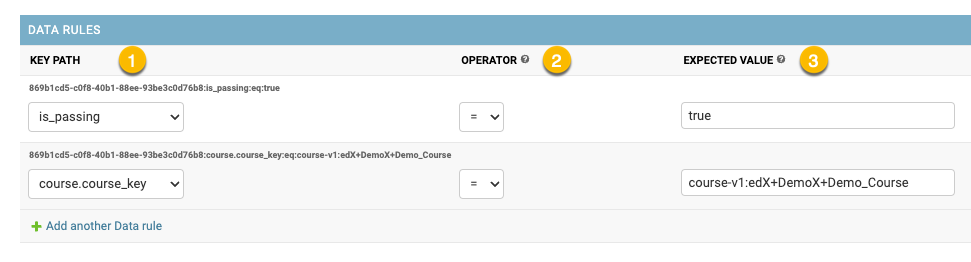
Changelink in the inline requirements list. Requirement detail pages use the admin URL patternhttps://<your-credentials-host>/admin/badges/badgerequirement/<id>/change/.Optionally, specify data rules in the “Data Rules” section:
Select a key path (specific data element).
Select an operator (how to compare the value).
Enter a value (expected parameter’s value).
A badge template can have more than one requirement. For example, a badge template issued on a specific course completion:
- Requirement 1:
event type:
org.openedx.learning.course.passing.status.updated.v1description:
On the Demo course completion.
- Data rule 1:
key path:
course.course_keyoperator:
"=" (equals)value:
course-v1:OpenedX+DemoX+Demo_Course
- Data rule 2:
key path:
is_passingoperator:
"=" (equals)value:
true
See also
- Badge Requirements
Full reference for badge requirements.
- Data Rules
Full reference for data rules.
5. Activate badge templates#
Navigate to
https://<your-credentials-host>/admin/badges/credlybadgetemplate/orhttps://<your-credentials-host>/admin/badges/accrediblegroup/.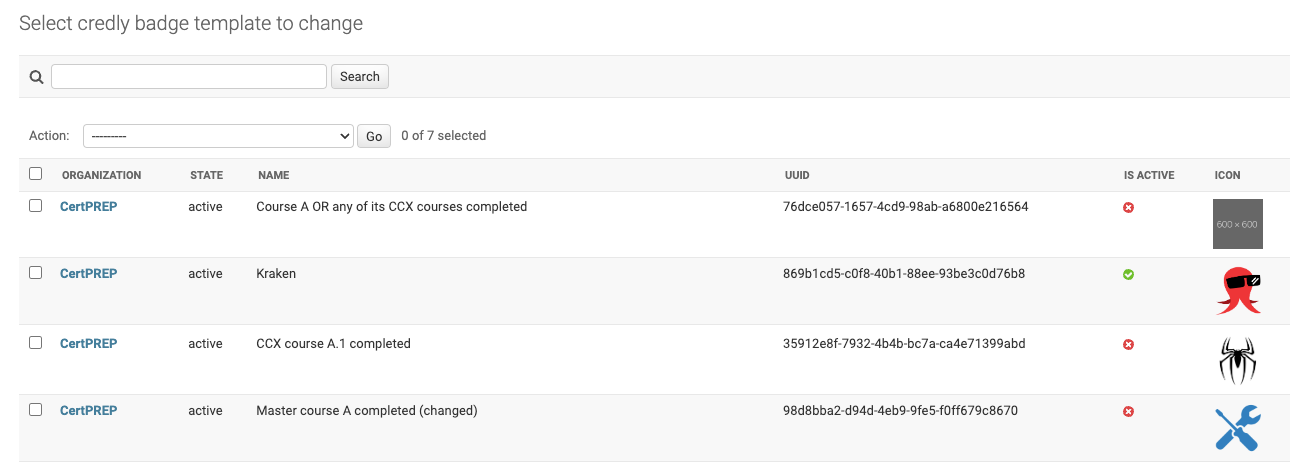
Open the badge template or group detail page and check the
Is activecheckbox.
Click Save at the bottom of the page to save and activate the configuration.
Warning
Changing configuration of active badge templates may cause inconsistent learner experience.
See also
- Activation and Deactivation
Full reference for badge template activation.