Quick Start#
Set up Verifiable Credentials issuing for your Open edX instance. By the end of this guide you will have a working issuance configuration that lets learners receive and store verifiable credentials.
1. Prerequisites and installation#
The Credentials service must be installed and running on your Open edX instance.
Option A: Using Tutor (recommended)#
Install the tutor-credentials plugin (provides the Credentials service):
pip install tutor-credentials
Install the tutor-contrib-badges plugin (enables verifiable credentials feature flags, configures the event bus, and sets up certificate synchronization):
pip install git+https://github.com/raccoongang/tutor-contrib-badges@main
See the tutor-contrib-badges README for additional details.
Enable the necessary plugins:
tutor plugins enable discovery mfe credentials badges
Rebuild images and launch:
tutor images build openedx discovery credentials
tutor local launch
The plugin automatically enables ENABLE_VERIFIABLE_CREDENTIALS for both the Credentials service and Learner Record MFE, and configures event bus consumers for certificate lifecycle events.
Option B: Other installations#
Install the Credentials service following the Getting Started guide.
Enable verifiable credentials in the Credentials service settings:
ENABLE_VERIFIABLE_CREDENTIALS = True
Enable verifiable credentials in the Learner Record MFE
.envfile:ENABLE_VERIFIABLE_CREDENTIALS=true
For all available settings, see Configuration.
2. Generate issuer credentials#
Each issuer must have its own decentralized identifier (DID) and private key. Unless you already have them, generate a new pair by using the management command provided by the Credentials service.
If you are using Tutor:
tutor local exec credentials ./manage.py generate_issuer_credentials
For other installations, run the command directly in the Credentials service:
./manage.py generate_issuer_credentials
Example output:
{
    'did': 'did:key:z6MkgdiV7pVPCapM8oUwfhxBwYZgh8dXkHkJykSAc4DHKD7X',
    'private_key': '{"kty":"OKP","crv":"Ed25519","x":"IGUT8E_aRNzLqouWO4zdeZ6l4CEXsVmJDOpOQS69m7o","d":"vn8xgdO5Ki3zlvRNc2nUqcj50Ise1Vl1tlbs9DUL"}'
}
Field |
Description |
|---|---|
|
Unique issuer decentralized identifier (DID). Used as the Issuer id in the admin configuration. |
|
Issuer private key in JWK format (stringified JSON). Used as the Issuer key in the admin configuration. |
Warning
Treat the private_key value as a secret. Store it securely, do not commit it to version control, and do not expose it in logs, screenshots, or shared configuration examples.
For additional management commands, see Management commands.
3. Configure issuer credentials#
Use the generated credentials to replace the stub values in the auto-created Issuance Configuration.
In the Credentials admin panel, navigate to
https://<your-credentials-host>/admin/verifiable_credentials/issuanceconfiguration/.Open the auto-created Issuance Configuration entry.
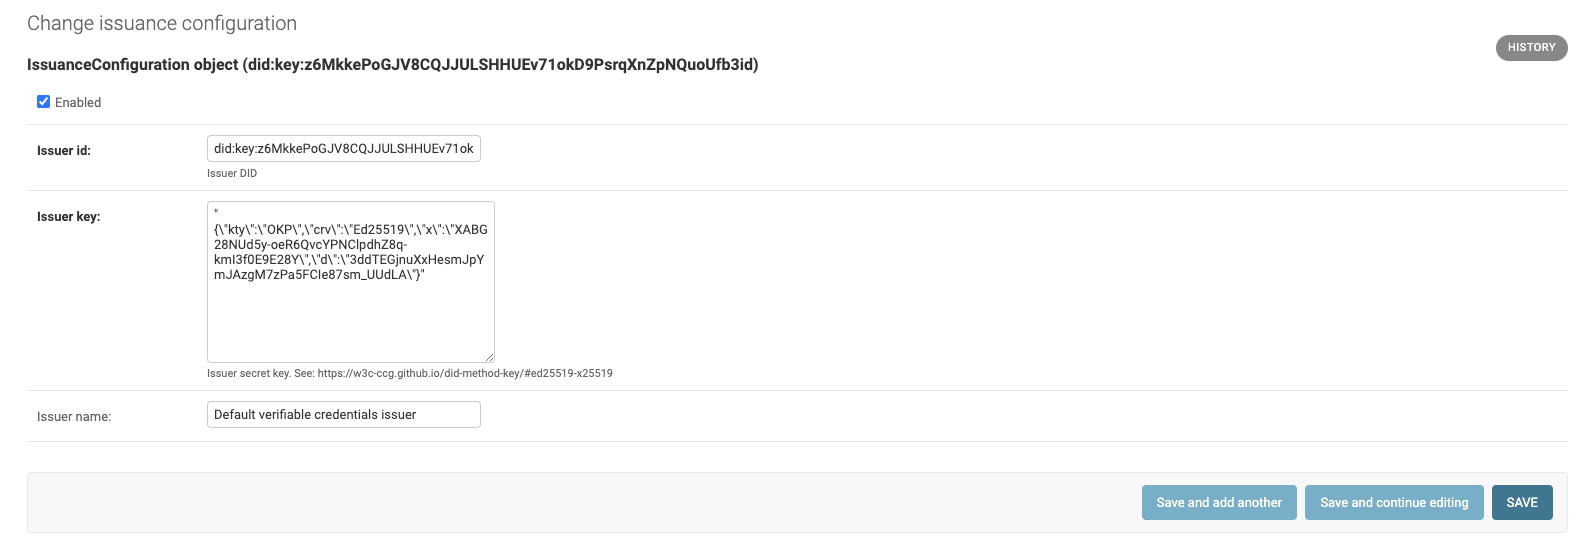
Set the Issuer id to the generated
didvalue.Set the Issuer key to the generated
private_keyvalue.Set the Issuer name to a verbose name for your issuer.
Note
The Issuer key must be a stringified JSON value, that is, an escaped JSON string rather than a raw JSON object. The
generate_issuer_credentialscommand outputs it in the correct format.Make sure the configuration is enabled, then click Save at the bottom of the page to save the issuer configuration.
For full admin panel reference, see Administration site.
4. Verify status list accessibility#
The Status List API endpoint is crucial for the feature. Once everything is configured correctly, it must be publicly available:
# each issuer maintains its own Status List; <issuer-did> is the ``did`` value from step 1:
https://<your-credentials-host>/verifiable_credentials/api/v1/status-list/2021/v1/<issuer-did>/
For endpoint details and response format, see Status List API.
5. Register the issuer for Learner Credential Wallet#
The built-in storage backend is the Learner Credential Wallet (LCWallet), which is a mobile app by the Digital Credentials Consortium. LCWallet only accepts credentials from allow-listed issuers.
To register your issuer, open a pull request in the community issuer registry adding your issuer’s DID (the did value from step 1) to registry.json, matching the format of existing entries. Once the registry maintainers merge your PR, LCWallet will accept credentials from your instance.
For development and testing, use the Sandbox Registry and submit a PR there with the same format.
For more information about LCWallet, including learner flow and usage details, see Storages.
See also
- Configuration
Feature flags, issuer settings, and management commands.
- Management commands
Additional commands for issuer and status list management.
- Administration site
Django admin pages for issuer configuration and issuance lines.
- Status List API
Status List API endpoint details and response examples.
- Storages
Learner Credential Wallet details, learner flow, and storage behavior.
- Components
Components, admin pages, and Status List API details.